Slides for Lesson 1 + Recording + Q&A Recording
💡 How to use this page: I suggest making a copy of this page so you have a checklist you can interact with for your setup flow + take your own notes if you get stuck.
Table of Contents
- What is Cursor and Why is it so powerful for a PM?
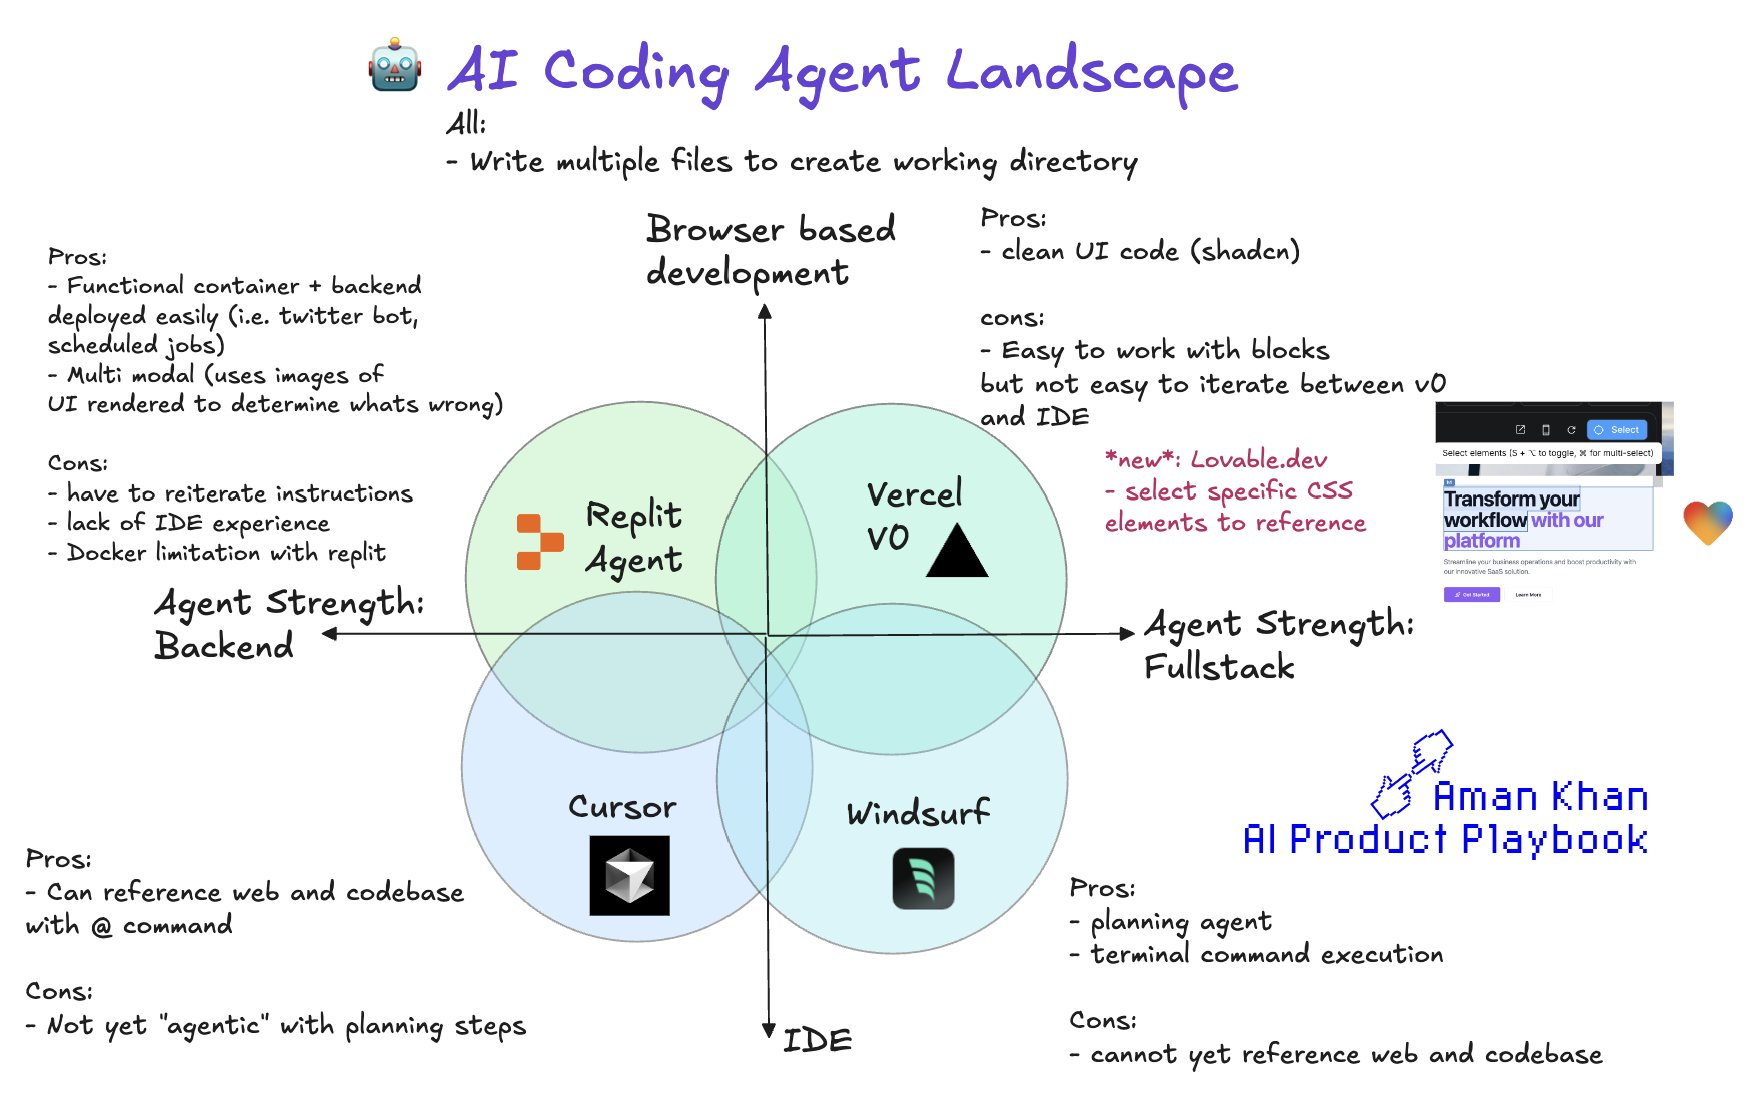
- When to use Cursor
- 🏁 Start Here → Lesson 1 Workflow
- How to Setup Cursor
- ✨ Cursor Guide
- Useful Commands (Tips and Tricks)
- Virtual Python Environments
- Clone the Trip Planner Repo
- Project Setup: Running the AI Trip Planner
- Idea Bank for Agents
- Homework 1
- Bonus: Deploy your project on Render
- Bonus: Supercharge Cursor with Claude Code
What is Cursor and Why is it so powerful for a PM?

✨ Cursor is more than a code editor; it’s an AI-first Integrated Development Environment (IDE) designed for building with Large Language Models. Think of it as a supercharged version of VS Code that has an AI assistant deeply integrated, acting as your personal tech lead or pair programmer.
For a Product Manager, this is a game-changer. Here’s why:
-
It Gives You Superpowers to “Vibe Code”: You don’t need to be a senior engineer to build. You can use natural language prompts to guide the AI, turning your product vision into a functional prototype. This process of “vibe coding” is about steering the AI with your product sense, not necessarily writing perfect code.
- All Your Context in One Place: Cursor can read your entire codebase, browse web pages for documentation, and reference previous conversations. This means you can ask complex questions and get context-aware answers without having to manually feed the AI information.
- Brainstorm PRDs:
prompt: using this codebase as a foundation, create a PRD for an agent/AI application that does _______ - Understand Technical Debt:
prompt: analyze this folder and tell me where the code is most complex and hard to maintain.
- Brainstorm PRDs:
- From Idea to Application with Agent Mode: You can use “agent mode” to execute complex, multi-step tasks. Give it a high-level goal, and it will plan and execute the steps, creating files, writing code, and even debugging itself along the way. As a PM, this allows you to build entire applications with simple prompts while retaining control over the system’s direction.
Even if Cursor feels intimidating at first, the core concepts are what matter. Once you understand how to prompt an agent, provide it with context, and guide it through building an application, you can apply these same principles to any AI development process, whether it’s with low-code tools or a full production engineering team. This is your safe space to build intuition. You can use the same principles with other “vibe coded” or real production applications to:
- Continue to develop them
- Run evals
- and get them to production.
When to use Cursor
🏁 Start Here → Lesson 1 Workflow
Goal: Go from zero to running a functional AI agent application on your own machine.
Instructions: You can click through each link until you complete the steps. If you get stuck, please review the useful commands!
Prerequisite Setup
- Setup cursor: Install the IDE and get familiar with its layout.
- Install Python Virtual Environment: Set up your virtual environment manager.
- Install nvm (node version manager) - Download the LTS version and Run the installer
- Get an OpenAI Key
- This shouldn’t cost more than a couple of dollars
- There is one here I will delete in a week but just to unblock:
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
Lesson Content
- Clone the AI Trip Planner Repo: Copy the course’s main application to your computer.
- Install Dependencies: Set up the application’s environment so it can run.
- Run the Application: Start the backend and frontend servers to see the app live.
- Make Your First Change: Use Cursor agent to make one small modification to the app.
- i.e.
change the background color to blue
- i.e.
- Setup a github account to push your changes back up!
How to Setup Cursor
- Install: Download and install Cursor from cursor.sh.
- Helpful video with Instructions, for the first 2m: https://www.youtube.com/watch?v=mM97V2FSzHg
✨ Cursor Guide
Components of the IDE
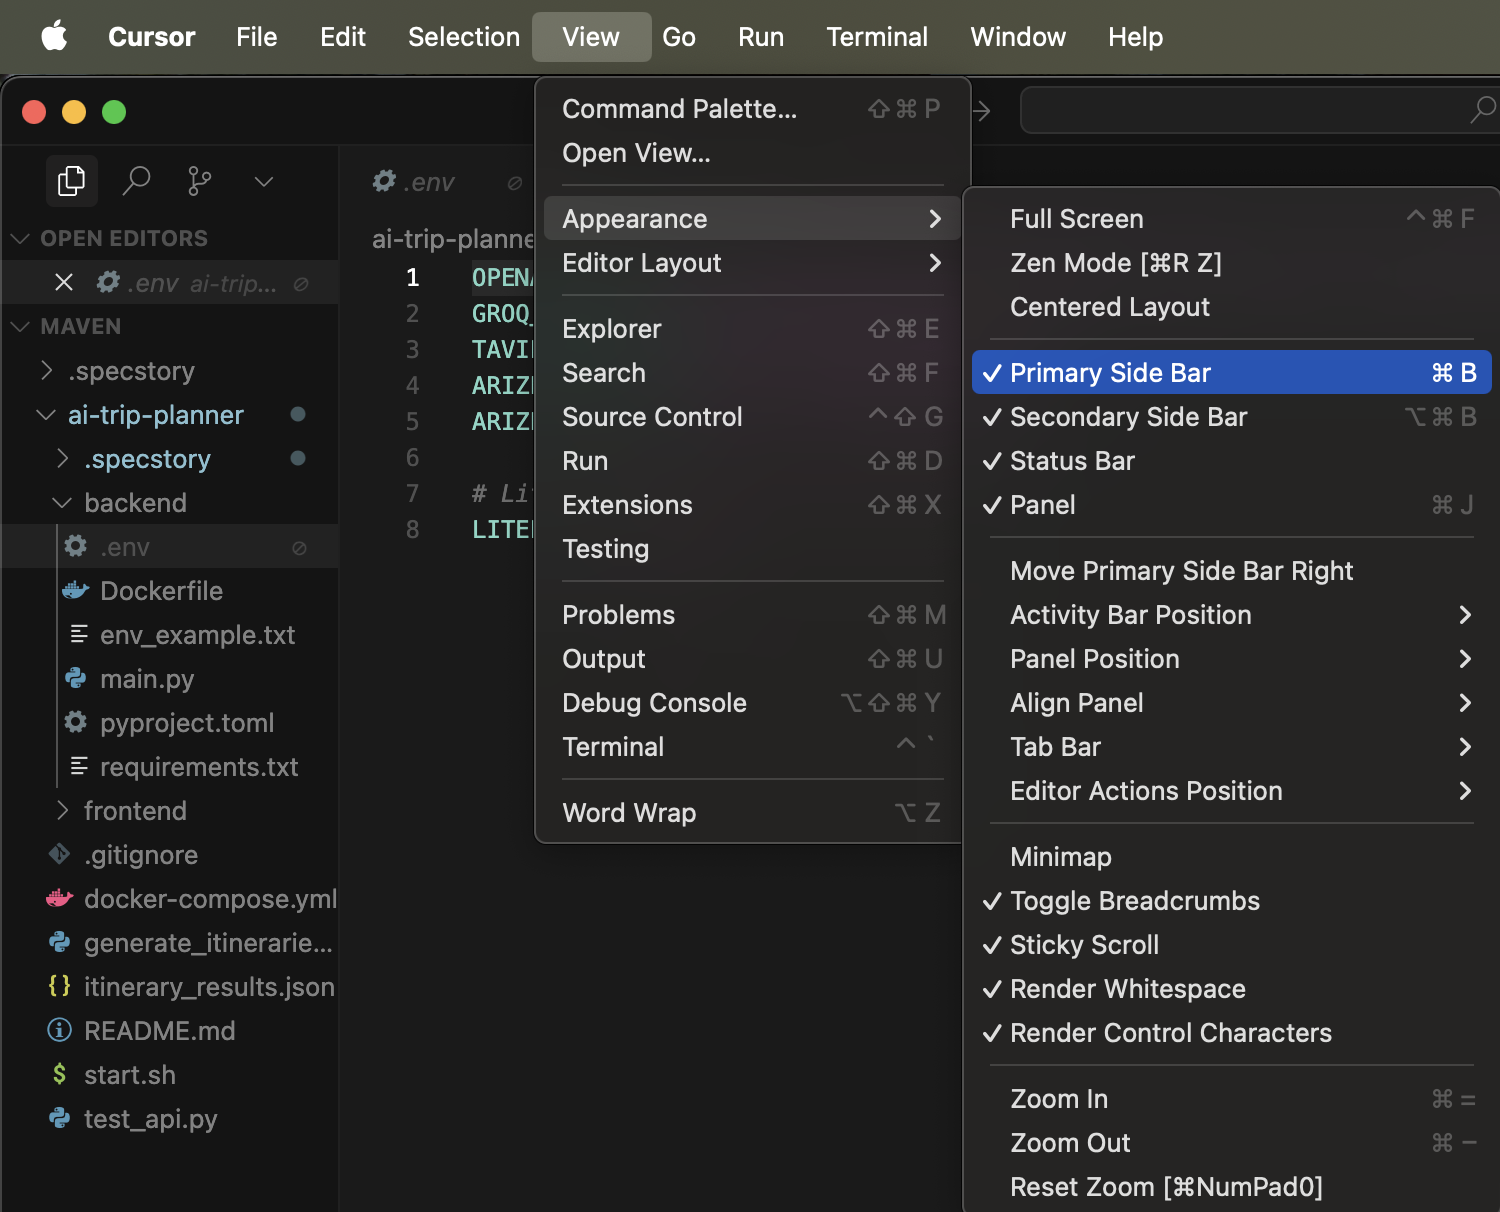
Check what layout you’re using:
You can start a terminal with cmd+T:

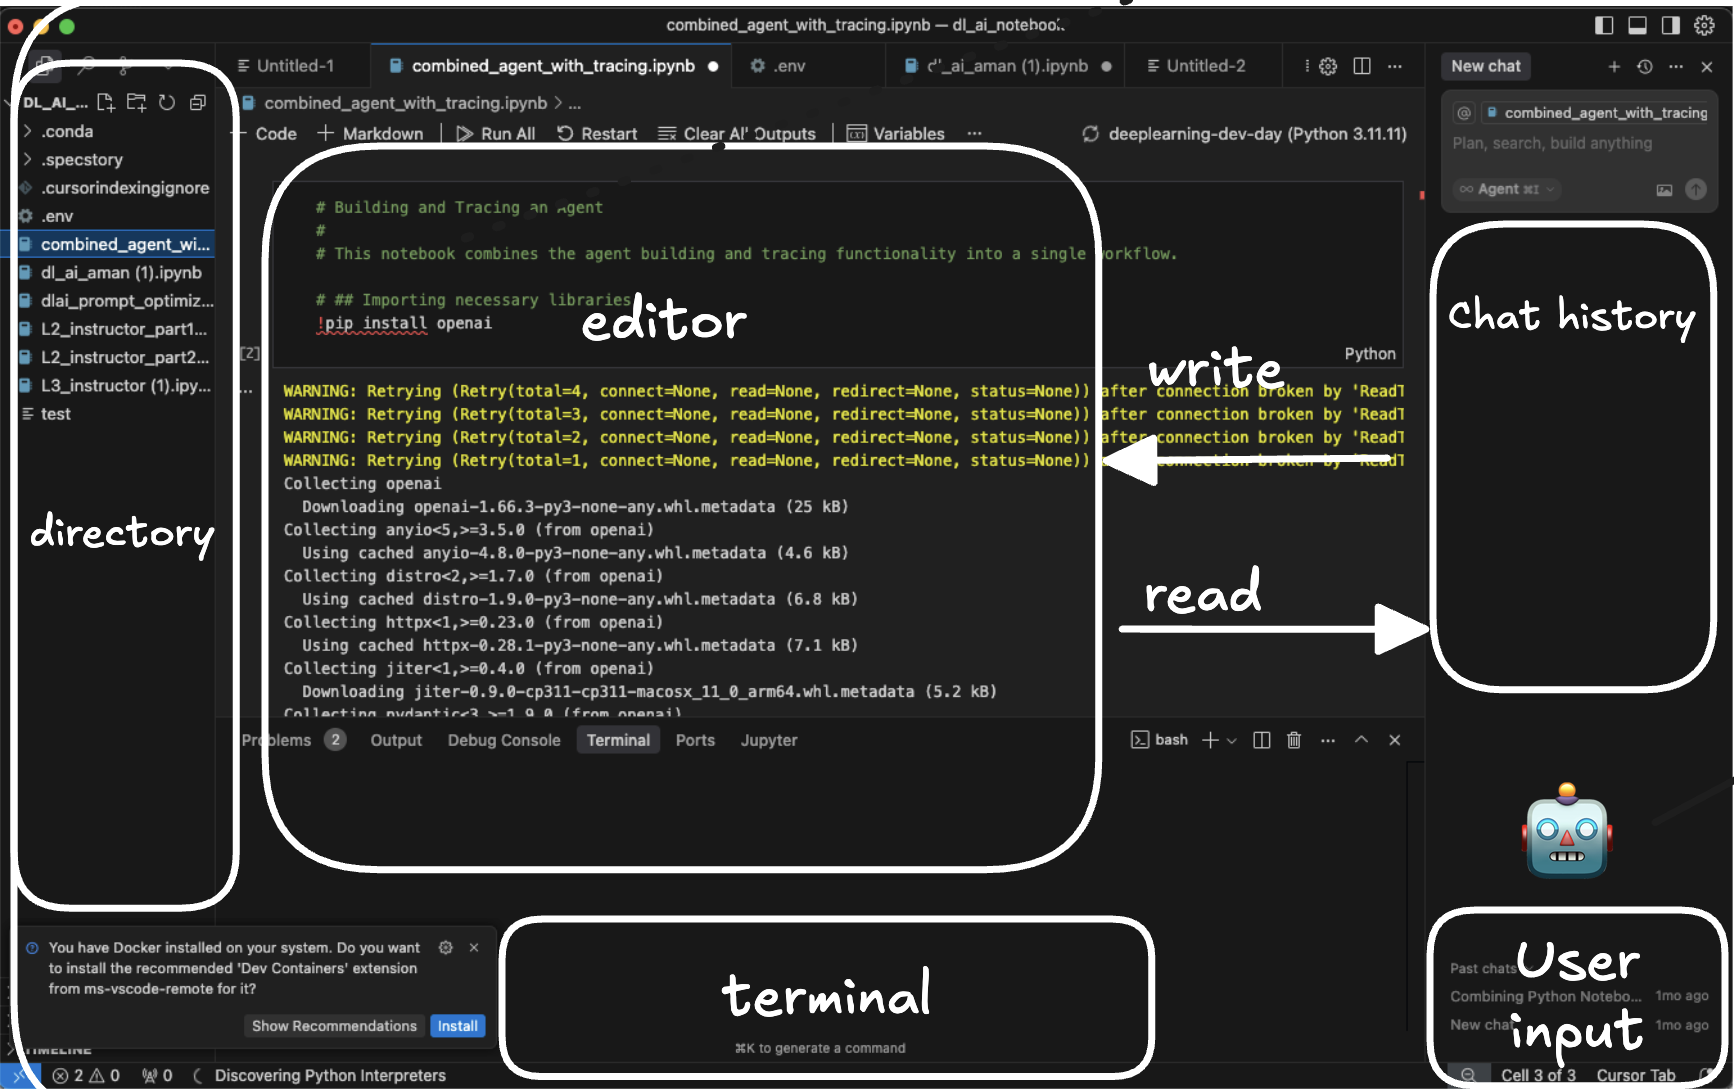
When you open Cursor, here are the key windows you’ll be working with:
- Directory (File Explorer): On the left, this shows all the files and folders in your project.
- Editor (Active Window): The central area where you view and edit code.
- Terminal: The panel at the bottom where you run commands.
- Chat History (AI Assistant): On the right, this is where you’ll interact with the AI. This is your primary tool for “vibe coding.”
✨ How to use Cursor as a PM - “Vibe Coding” with Cursor
-
Copy-Paste Errors: If you get an error in your terminal, copy the entire error message and paste it into the agent window. A good prompt is:
"I got this error. What does it mean and how do I fix it?" -
Ask “Dumb” Questions: There are no dumb questions. Use the chat to understand what a piece of code does.
"What is the purpose of the main.py file? Explain it to me like I'm a product manager." -
Iterate with Prompts: Start with a simple prompt and then refine it. “Build me a simple web app” → “Add a login page to the web app” → “Make the login page look nicer with CSS.”
-
Reference context using
@Symbol- For example, you can say
@codebaseor@internet - You can also simply copy paste docs from the internet in
- For example:
prompt: Using these docs, instrument my application for observability: https://arize.com/docs/ax
- For example:
- For example, you can say
Key Features
-
Context with
@: This is your superpower. You can tell the AI exactly what context to use for its response.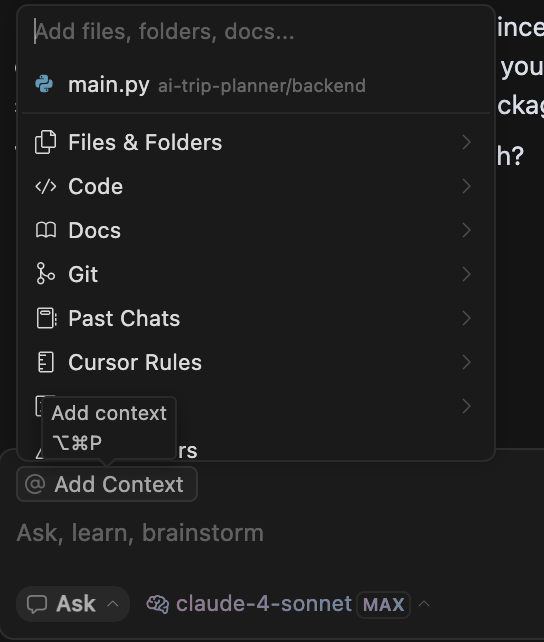
@Codebase: Tells the AI to read your entire project.@<filename>: Focuses the AI on a specific file.@internet: Allows the AI to search the web.@<URL>: You can paste in a link to documentation, and the AI will use it as context. Example:Using these docs at @https://arize.com/docs/ax, instrument my application for observability.
- Agent Mode: Use
Cmd+L(orCtrl+L) to open the agent. This is where you give high-level prompts to build or modify your application. Agent mode can look across your directory, take action, and suggest changes.- Note: you may have to intervene at times - like hit “continue” or “skip”
- Cursor Rules: You can set rules for the AI to follow, like “always use this specific library” or “write comments for every function.” This is great for ensuring consistency as you build.
- This is super helpful when working across an existing codebase
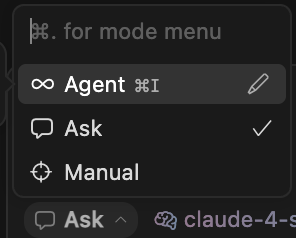
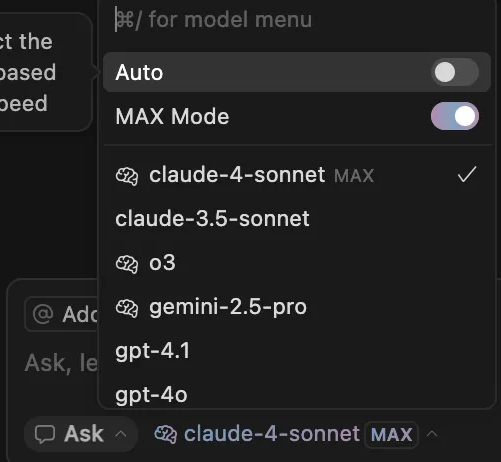
- Model Selector:
- Claude-4-sonnet Is the top model, then Gemini 2.5 pro
- Try to use max mode when you can
Useful Commands (Tips and Tricks)
Cursor
Cmd+T(orCtrl+T): Opens the terminal.Cmd+L(orCtrl+L): Opens the agent side panel.Cmd+K(orCtrl+K): Uses Cursor to generate a command in terminal inline with AI.
Terminal Primer
The terminal is how you “talk” to your computer directly. You only need to know a few basic commands.
ls: list the files and folders in your current directory.cd <folder_name>: change directory into a folder.cd ..: Move back up one directory level.
Github Primer
GitHub is how developers store and collaborate on code. For this course, you just need the basics.
git clone <URL>: Copies a repository (a project’s folder) from GitHub to your computer.git add .: Stages all your changed files, preparing them to be saved.git commit -m "Your message here": Saves your staged changes with a descriptive message.git push: Pushes your saved commits up to GitHub to share them.
Virtual Python Environments
Important: Python on your computer can get messy. Different projects need different versions of libraries, which can conflict. A virtual environment is like a clean, isolated workspace for each project. We highly recommend you use them.
The easiest and fastest way to create a Python virtual environment is by using the built-in venv (Virtual Environment) module. It requires no extra installation.
1. Create the Virtual Environment
Navigate to your project folder in the terminal and run the following command. This creates a new folder (e.g., venv) containing the Python interpreter and necessary files.
python3 -m venv venv
2. Activate the Environment
To start using the virtual environment, you need to activate it.
- macOS / Linux 🐧:
source venv/bin/activate - Windows 💻:
.\venv\Scripts\activate
Your terminal prompt will change to show the name of the active environment (e.g., (venv)), indicating you’re now working inside it. Any packages you install will be isolated to this environment.
To deactivate it, simply type deactivate.
Note: To maintain multiple environments, you can also use conda
**What is Conda?** Conda is an environment manager. It lets you create these isolated workspaces (`environments`) so that the packages you install for one project don't interfere with another. Install Conda here: [https://www.anaconda.com/docs/getting-started/miniconda/main](https://www.anaconda.com/docs/getting-started/miniconda/main) **Python Commands to use:** 1. `conda create -n your-env-name python=3.12` # Creates a new environment named "your-env-name" with a specific Python version. 2. `conda activate your-env-name` # "Enters" or activates the environment. You must do this every time you work on the project. You can copy paste the below line by line into your terminal: ```python > pip install conda #installs conda on your machine > conda create -n your-env python=3.12 > conda activate your-env ```Clone the Trip Planner Repo
- Option 1: when you start cursor, you can select
clone repo→ copy paste this in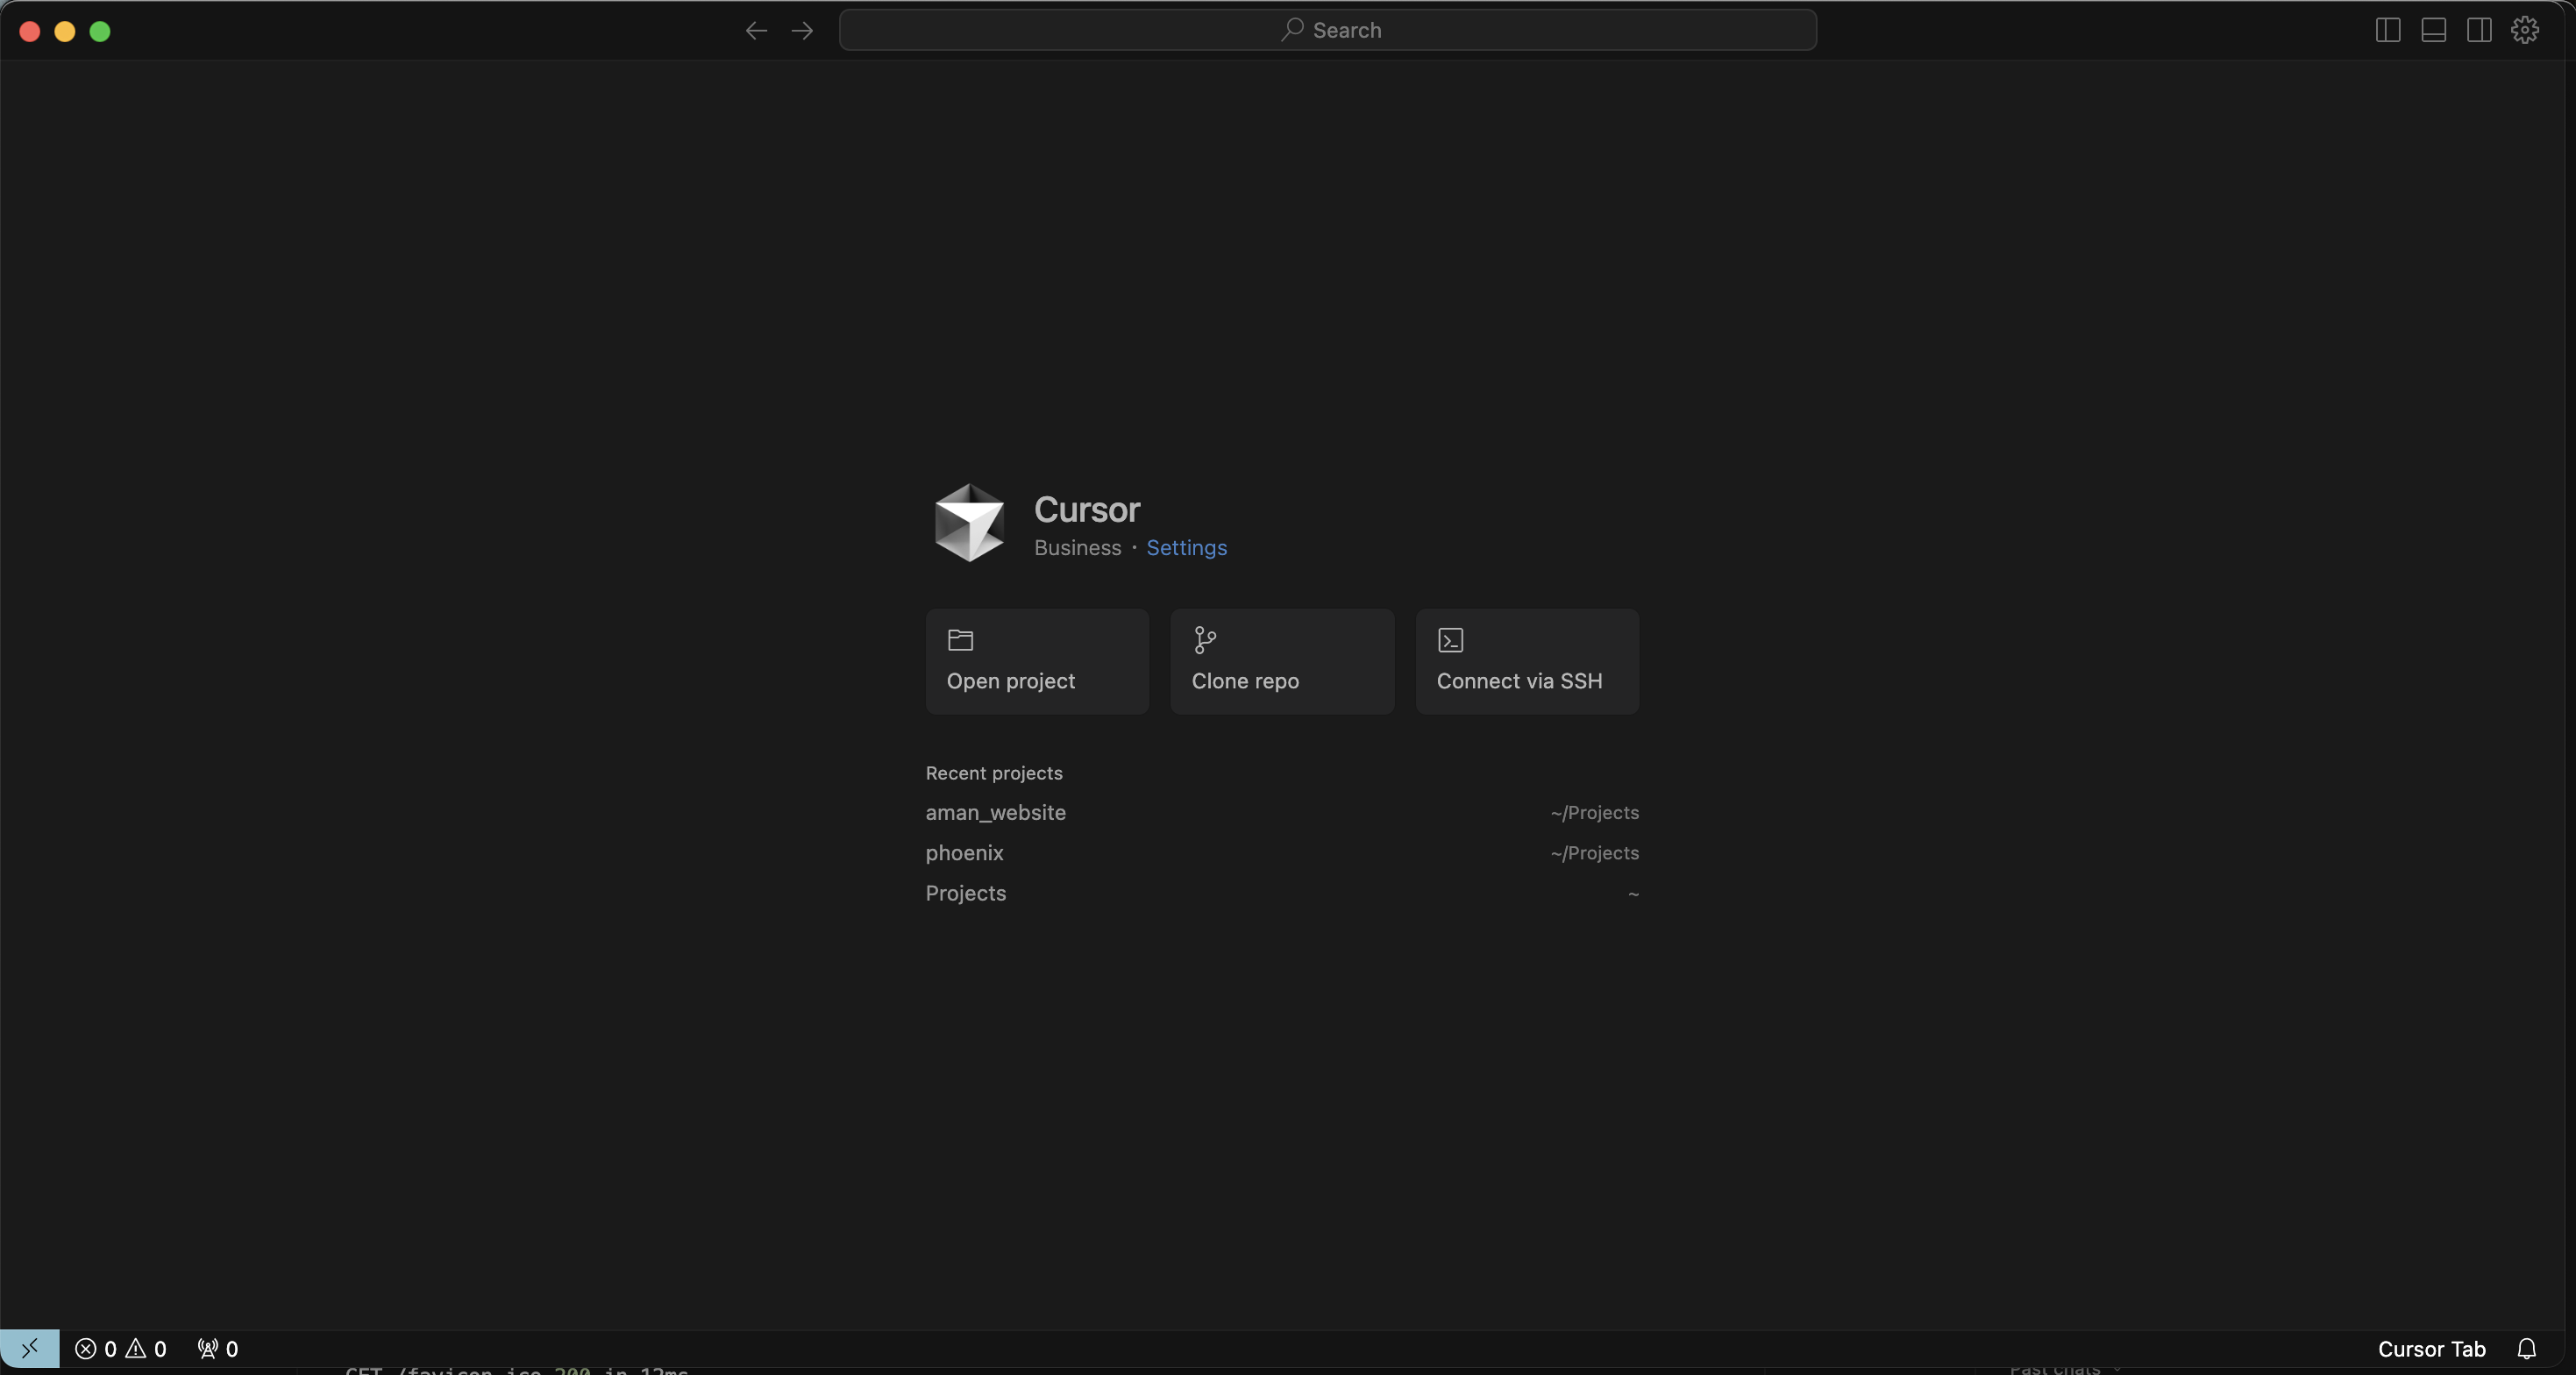

- Option 2: From your terminal, type in
git clone https://github.com/amank94/ai-trip-planner
Project Setup: Running the AI Trip Planner
This is our main goal for the first session. We are going to get the AI Trip Planner application running locally.
-
Clone the repo and navigate to the repo
a. Navigate into the Project Folder:
cd ai-trip-planner -
Create the Environment File for Your API Keys:
This is a crucial step for telling the application what your secret API key is.
- Navigate into the backend directory by typing this into the cursor terminal:
cd backend - Create a new file named
.env:- In your Cursor terminal, type:
touch .env
- In your Cursor terminal, type:
-
Open the new
.envfile in the Cursor editor (you’ll see it in the file directory on the left). - Add the following line to the file, replacing
YOUR_API_KEY_HEREwith your actual OpenAI key:OPENAI_API_KEY=YOUR_API_KEY_HERE - Save the
.envfile. Cursor will automatically use this to load your key.
- Navigate into the backend directory by typing this into the cursor terminal:
- Set Up the Backend:
- Navigate into the project folder:
cd ai-trip-planner - Create and activate your python virtual environment (if you haven’t already):
source venv/bin/activate - Install the required Python packages:
pip install -r requirements.txt
- Navigate into the project folder:
- Start the Backend Server:
- While in backend folder, in the terminal, type in
python main.py- Ignore warnings about arize credentials missing
- While in backend folder, in the terminal, type in
- Set Up and Start the Frontend:
- Open a new terminal instance. (click the + button in the top right of the terminal)
- Navigate into the
frontenddirectory:cd frontend - Install the required packages: in the terminal
npm install - Start the frontend server:
npm start
- View Your Live App!
- Your terminal will give you a URL (usually
http://localhost:3000) to view the running application in your browser.
- Your terminal will give you a URL (usually
Idea Bank for Agents
Think about agents as smart, enthusiastic college interns. They have access to powerful tools and can get a lot done, but they still require clear direction and supervision. They might not get it perfect the first time, and that’s okay. You have to check their work.
This is where the concepts we’ll cover later, Evals and Observability, become critical. They are the processes you use to check your “intern’s” work and help them improve.
✨ Simple Agent Ideas to Get You Started:
- A “Meeting Summarizer” Agent: Give it a transcript, and it pulls out the key decisions and action items.
- A “Personalized News” Agent: Tell it your interests, and it scours the web for the top 3 articles for you each morning.
- A “Workout Planner” Agent: Tell it your fitness goals and available equipment, and it generates a weekly workout plan.
- A “PRD Helper” Agent: Give it a rough idea, and it generates a structured PRD with user stories and success metrics.
Homework 1
-
Complete the Cursor setup: Ensure you have Cursor and Virtual Environments installed and can run basic commands.
- ✨ Write your own agent PRD (within Cursor):
- Create a new file in Cursor called
my_agent_prd.md. - Use the AI agent (
Cmd+L) with a prompt like: “Act as a senior product manager. Based on my idea for a [your agent idea here], write a one-page Product Requirements Document.” - Copy paste that PRD back into the agent flow and see what happens!
- Create a new file in Cursor called
- ✨ Push your PRD to your own branch on GitHub:
- This is a crucial step to save your work! Use the
git add,git commit, andgit pushcommands you learned. This will be great practice for how real development teams work. git checkout -b your-branch(Creates and switches to your new branch)git add my_agent_prd.mdgit commit -m "feat: Create initial PRD for my agent"git push -u origin your-name-prd-branch
- This is a crucial step to save your work! Use the
Bonus: Deploy your project on Render
Congratulations on building and modifying your first AI application! Now, let’s get it live on the internet so you can share it with anyone. We will use a platform called Render.
Goal: Deploy our Python backend and our React frontend as two separate services that can communicate with each other.
Part 1: Deploying the Backend API
-
Create a Render Account: Sign up for a free account at render.com using your GitHub account.
- Create a New “Web Service”:
- On the Render Dashboard, click New + and select Web Service.
- Connect your GitHub account and select your forked
ai-trip-plannerrepository.
- Configure the Backend Service:
- Name: Give it a unique name, like
my-trip-planner-api. - Root Directory: Set this to
backend. This tells Render to only look inside thebackendfolder for this service. - Runtime: Render will auto-detect Python. Select Python 3.
- Build Command: Set this to
pip install -r requirements.txt. - Start Command: This is important. Use
gunicorn backend.main:app. (This is a production-grade server, which is better than theflaskorfastapidevelopment server). - Instance Type: Choose the Free plan.
- Name: Give it a unique name, like
- Add Environment Variables:
- Scroll down to the “Environment” section.
- Click Add Environment Variable.
- Key:
OPENAI_API_KEY - Value: Paste in your actual OpenAI API key.
- Add another environment variable
- Key:
PORT - Value:
8000
- Deploy!
- Click Create Web Service. Render will now start building and deploying your backend. It will take a few minutes. You can watch the logs. Once it’s done, you’ll have a live URL for your API (e.g.,
https://my-trip-planner-api.onrender.com).
- Click Create Web Service. Render will now start building and deploying your backend. It will take a few minutes. You can watch the logs. Once it’s done, you’ll have a live URL for your API (e.g.,
Part 2: Deploying the Frontend Application
- Create a New “Static Site”:
- Go back to the Render Dashboard. Click New + and select Static Site.
- Select the same forked
ai-trip-plannerrepository from GitHub.
- Configure the Frontend Service:
- Name: Give it a unique name, like
my-trip-planner-ui. - Root Directory: Set this to
frontend. - Build Command: Set this to
npm install && npm run build. - Publish Directory: Set this to
frontend/build.
- Name: Give it a unique name, like
- Connect the Frontend to the Backend:
- Go to the “Environment” section for this new frontend service.
- Click Add Environment Variable.
- Key:
REACT_APP_API_BASE_URL - Value: Paste the live URL of your backend API that you just deployed (e.g.,
https://my-trip-planner-api.onrender.com).
- Deploy!
- Click Create Static Site. Render will build your React app and deploy it.
In a few minutes, your frontend will be live on its own URL. When you visit it, it will now make API calls to your live backend service.
You have now achieved a true prototype-to-production workflow. You have a live, shareable, full-stack AI application that automatically re-deploys every time you push new code to GitHub.